
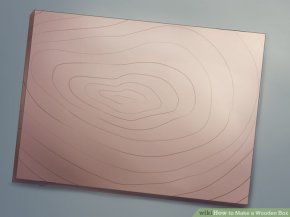
 Choose your wood. You can use repurposed wood from previous projects, boards from broken down pallets, or you can purchase and cut new wood. Consider what your box will be used for.
- For example, if you're making a jewelry box, consider thin pieces of cedar, ash or oak. It will be easier to make a smaller box with thinner wood. Save larger pieces or boards for bigger boxes. This will also prevent you from having to do too much trimming.
Gather your supplies. Keep all your basic tools in your workspace. If using power tools, make sure that you have access to power outlets. At the very least, you'll want a ruler, hammer, nails, wood glue or putty, and of course, your boards.
- If using power tools, use caution and always wear eye protection.
Measure and mark your boards. First, you'll need to decide on the size of your box. Specifically, you'll want to determine how long, wide, and tall to make your box. Then, mark the measurements on your boards using a ruler and pencil.
- If you're building a box for a specific purpose or to hold a certain item, measure the item to ensure it will fit inside your finished box.
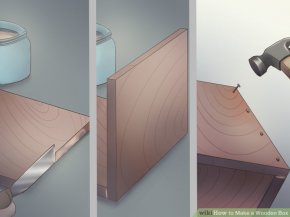
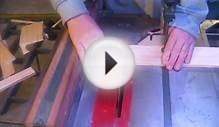
Cut your boards, if not already to size. Use a hand or circular saw to cut the boards according to your measurements.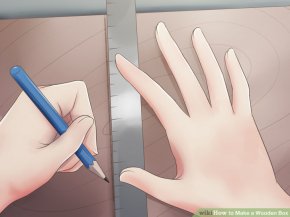 Remember you'll need four boards for the sides, one for the base, and one for your lid.
- Power tools can make the job easier, but are not necessary. You can easily make your box using a screwdriver, carpenter's square, hand saw, and hammer.
Assemble the side pieces using a butt joint. Join the sides together at a right angle using glue between the joints for durability. At this point, it should look like a square with no base or lid attached yet. Next, hammer or drill in finishing nails, wood screws or dowels.
- You may want to use clamps to hold the glued sides together while you drill nails or screws into them.
- If you're using dowels, drill a hole through the side of one piece into the side of another. Use a wooden dowel to pin the pieces together in an "L" shape. After the sides are pinned, cut the dowel flush with the sides.
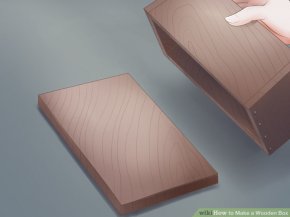
Attach the sides to the base. Make sure the sides sit evenly on the base or are snug around the base, depending on your design. Use glue to attach the base and sides. Hammer or drill in finishing nails, wood screws, or dowels.
- Allow your box to dry thoroughly before sealing or using it.
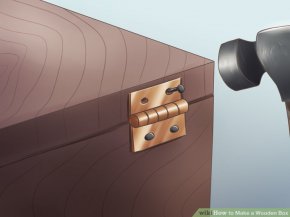
Attach a hinged lid to the box. Set the lid on the box so the lid and side are flush, then measure and mark where you'd like your hinges to be. Keep the hinge knuckle facing out from the back of your box and drill or hammer to attach it to the side and then the lid.
- When laying out the hinges, it is important that you square them to the top and to the sides of the case. Otherwise, the door will not close or open correctly.
- It's helpful to clamp the side and lid together when measuring and installing the hinges.
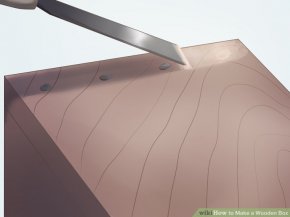
Fill any nail holes. Use a wood putty and putty knife to fill nail holes. Let the putty dry completely before sanding the areas smooth.
- Filling and sanding nail holes will add a professional look to your project. Feel free to omit this step if you're not concerned with decorative aspects.
RELATED VIDEO


Share this Post
latest post
-
 Fabric beads · How To make? June 11, 2026
 -
 Custom Handmade beaded jewelry May 22, 2026
 -
 Handmade Rosary beads May 2, 2026
 -
 Things to make with beads April 12, 2026
 -
 Easy to make Beaded bracelets March 23, 2026
 -
 Handmade glass beads March 3, 2026
 -
 Making Keychain with beads February 11, 2026
 -
 Make Polymer Clay beads January 22, 2026
 -
 Making copper wire Jewelry January 2, 2026