
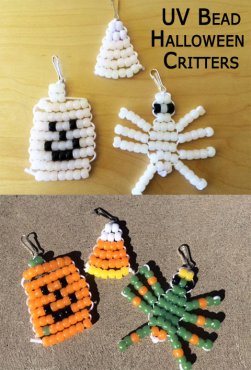
 This cute activity is perfect for a Halloween party or crafting afternoon. We used Color Changing UV Beads in these Pony Bead Critters that can hang from backpacks, zippers, lockers, classroom ceilings, party favor bags or wherever. They will even change color in the sunlight.
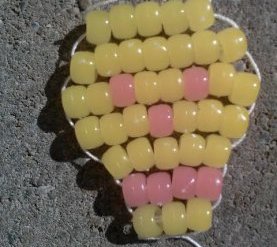
Here’s step-by-step instructions on how to make a skull using UV Beads. We’ve also included links to other sites that offer a ton of different Halloween bead patterns. You can use any pattern and just substitute the UV Beads for pony beads.
 Halloween is one of my favorite holidays, partly because I love its history and partly because I love how it has a life apart from that original history!
There are simple Halloween bead patterns for holiday crafts are all over Pinterest. That being said, here’s how I like to make a Halloween skull. Not just any ordinary Halloween skull, mind you; let’s make a skull that has two faces. To do this, you will need some Steve Spangler Science UV Beads.
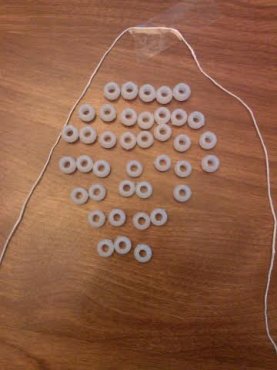
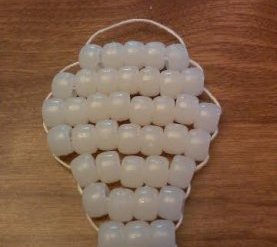
 Make a pile of 32 beads of one pale color. Make a pile of 7 darker beads. White and black are great, but be creative! Just be sure you’ve got a big pile of beads that will be pale even when exposed to UV rays, and a smaller pile of beads that will get darker in the sunlight. UV beads are all white until exposed to the sun’s rays, so be sure you are keeping your colors apart!
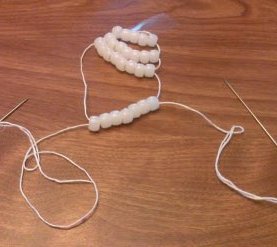
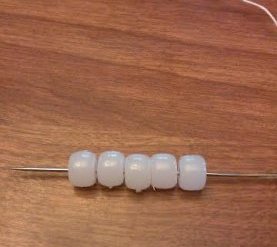
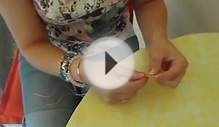
Cut a piece of heavy string about 2 feet long. Thread both ends through a long, strong needle. Fold the string in half and tape it to a table or cutting board so it won’t move when you tug on it. And you will be doing some serious tugging!
Some people like to tie a clasp of some kind at the top so your skull is easy to hang. I prefer leaving some slack thread at the top for hanging. Your call.
RELATED VIDEO

Share this Post
latest post
-
 Handmade paper beads July 21, 2026
 -
 Who makes Pandora Jewelry? July 1, 2026
 -
 Fabric beads · How To make? June 11, 2026
 -
 Custom Handmade beaded jewelry May 22, 2026
 -
 Handmade Rosary beads May 2, 2026
 -
 Things to make with beads April 12, 2026
 -
 Easy to make Beaded bracelets March 23, 2026
 -
 Handmade glass beads March 3, 2026
 -
 Making Keychain with beads February 11, 2026