 Melted Bead Ornaments
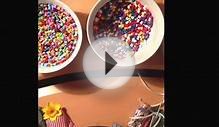
The concept of melting the beads together in a design is the same, but with this technique, the results are more artistic and a little bit like your own melted bead art experiment. Every ornament is unique and depending how each bead melts, the end result is always cool and colorful.
First, place metal cookie cutters on a cooking sheet that has been covered with parchment paper.Arrange your meltable beads in ONE layer on the bottom inside of each cookie cutter. Push the beads in place if you need to make one layer.
Then place them in a preheated oven at 400 degrees for about 10 minutes. Let them cool, and then punch them out of each cookie cutter. String a 1/8″ wide ribbon through one of the top holes of the beads to hang. These would look great hanging on a tree or wrapped on a gift with a pretty bow. The colors and the way the light looks when it goes through them, I had to hang them on one of our windows. Lovely!
 You can tailor the colors for each ornament, but you get just as satisfying effect by randomly picking a handful of beads and seeing what colorful melted creation you get. For instance, I put mostly green beads with a few colored beads in the Christmas tree melted bead ornament on the right. I used a palette of pinks in the middle heart ornament and a random sampling in the heart ornament on the left. Happy melted beading!
Melted Bead Cupcakes
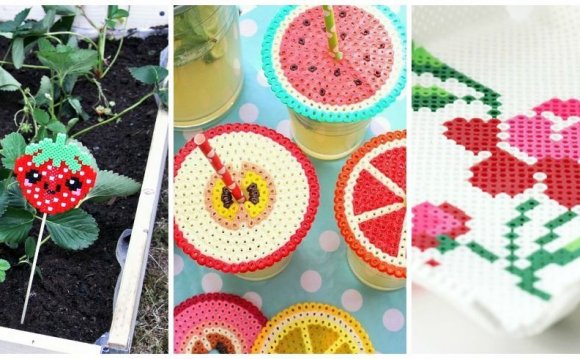
Simply place your meltable beads, like Perler Beads®, in a mini metal cupcake pan, melt in an preheated oven 400 degree oven for about 10 minutes, let cool, and pop out of the cupcake tin. Be sure to spray the pan first with non-stick spray so they pop out easily.

To make into cute cupcakes, you will need pom poms (large and small ones) in a variety of colors and some tacky craft glue.
Glue one large pom pom in the bottom of the melted bead cupcake shapes, and glue a small one on top for extra decoration.
Place on a plate, set out for decoration, or if you want to get super crafty, I made a quick mini cupcake stand using small wood candlestick pieces glued in between wood circles, spray painted the whole thing, and glued colorful ric rac along the edges for extra flair. This could be a birthday party centerpiece, or just a festive decoration! Have fun cupcake crafting!
Useful to use for specific holiday times such as Halloween below but also great to make to house knick knacks in kid’s bedrooms, etc.

You can make multi-color bead bowls, or make your own color design using only a few colored bead choices.
Start with Perler Beads®, a little cooking spray, and a small oven-safe bowl. Spray the bowl with a little cooking spray. Then, select the color palette of beads you want and place them in bowl. Press them down in the bowl until there is only one layer of beads. The beads will automatically climb the sides of the bowl along the edges. Fill bowl with enough beads until desired height.
Put on cooking tray and place into a preheated oven at 400 degrees for about 10 minutes.
And this what happens when you leave your bowls in for 20 minutes – the beads get even meltier – although they are harder to get out of the bowl too. Pop the bowls out and let cool. Display and use as desired!


RELATED VIDEO


Share this Post
latest post
-
 Who makes Pandora Jewelry? July 1, 2026
 -
 Fabric beads · How To make? June 11, 2026
 -
 Custom Handmade beaded jewelry May 22, 2026
 -
 Handmade Rosary beads May 2, 2026
 -
 Things to make with beads April 12, 2026
 -
 Easy to make Beaded bracelets March 23, 2026
 -
 Handmade glass beads March 3, 2026
 -
 Making Keychain with beads February 11, 2026
 -
 Make Polymer Clay beads January 22, 2026