Steps
Part 1
Beginning Your Chain Mail
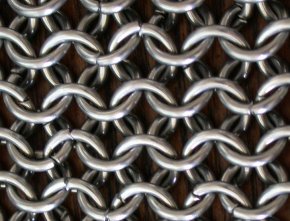
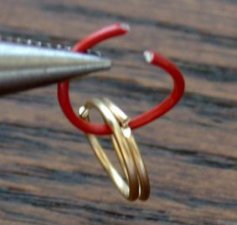
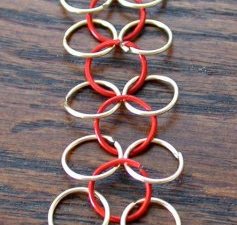
- Choose a weave that you like. This article describes one method of weaving: the European 4-in-1 weave, a common and widely used weave. It gets its name from the fact that each non-edge ring has four other rings connected to it.
- There are ways to vary the basic European 4-in-1 weave that this article describes, such as the European 4-in-1 expanding (FFF) or make the European 6-in-1 (where you'll use six rings in one, rather than the four in one described by this article).
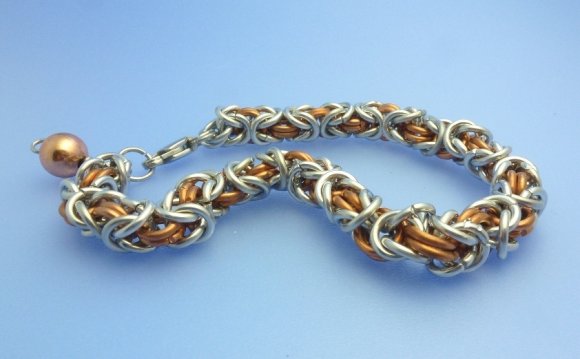
- Choose a design you like. If you are just beginning, start with something fairly small and simple until you get the hang of it. A full chainmail shirt has thousands of rings in it and can weigh more than 30 pounds. Instead, try a bracelet, belt, key chain, or other smaller, simpler design.
- Try chainmail jewelry for an unusual and elegant piece that you can wear for any occasion.
 When choosing wire for jewelry purposes, smaller wire will be better accepted by the general public. 18 gauge (wire thickness) down to 20 or 22 gauge is common. 24 gauge and smaller wire is starting to get into rings where you may need magnification to work them well. 16 gauge and up tends to produce thicker, more bulky pieces that have limited appeal.
- Try chainmail jewelry for an unusual and elegant piece that you can wear for any occasion.
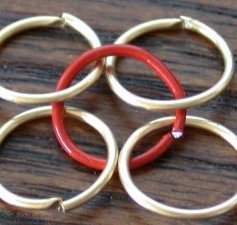
- Choose your material. Decide whether you will make your own rings from wire or purchase rings. Rings are available in a variety of combinations of inside diameters (distance between the inside edges of the ring-abbreviated to ID) and gauges (wire thickness, or wire diameter [abbreviated WD]). The relationship between these two numbers, using the formula ID/WD, is the aspect ratio (abbreviated AR).
- Bigger rings will cover an area with fewer rings and less weight, but the texture will be coarser, regardless of AR.
- Rings with a larger AR will not be as strong as smaller AR rings of the same material, regardless of the material. Wire of a thicker gauge will be more durable, but also weigh more and be harder to work with.
- Materials for rings are not limited to plain iron or steel.
 You can also get rings in galvanized steel, stainless steel, aluminum, titanium, inconel, niobium, silver, gold, and rubber. You can also get rings in a variety of colors and create many different inlays with them.
 - An easy source of wire to get started is coat hangers. They are fairly easy to bend. The downside is that you have to cut your own rings and the result is not very strong.
- Another easy (but not as easy) source for wire is to go to a hardware store and go into the Fencing section and buy a spool of electric fence wire; this type of wire is typically available very inexpensively.
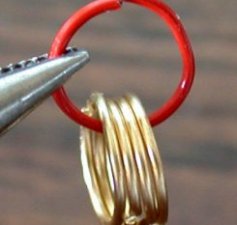
- Choose your tools.
 You'll need pliers for the rings, as well as a metal rod to wind the wire for the rings around. Match your pliers to your material. The pliers you would use on heavy gauge stainless steel will not be the same pliers you use on fine gauge silver.
- The teeth (the serrations on the jaws) on many standard pliers may damage the metal finish of your rings, especially on smaller wire and/or softer materials. For delicate (relatively speaking) ring materials, look for toothless pliers, or even tweezers if you are working with very small wire. You can also look around for plier jaw covers. A cheap alternative to plier jaw covers is plastic tubing of the correct gauge; slip the tubing over the ends of your pliers. The pliers must be strong enough to bend the metal you are using and fine enough to handle the ring size you choose.
- Types of metal rods include Phillips screwdrivers, or a steel rod purchased from a hardware store. Often you can find some type of metal rod lying about your house.
Source: www.wikihow.com
RELATED VIDEO

Exquisite Chainmaille Jewelry
A begginners guide to making chainmaille jewelry.
How to Make a box chain for chain mail style jewelry
Share this Post
latest post
-
 Fabric beads · How To make? June 11, 2026
 -
 Custom Handmade beaded jewelry May 22, 2026
 -
 Handmade Rosary beads May 2, 2026
 -
 Things to make with beads April 12, 2026
 -
 Easy to make Beaded bracelets March 23, 2026
 -
 Handmade glass beads March 3, 2026
 -
 Making Keychain with beads February 11, 2026
 -
 Make Polymer Clay beads January 22, 2026
 -
 Making copper wire Jewelry January 2, 2026