Step 1:
Getting StartedPolymer clay may stain. CLAY MAY DAMAGE UNPROTECTED FURNITURE OR FINISHED SURFACES. DO NOT USE polymer clay on unprotected surfaces. We recommend working on the Sculpey clay mat, wax paper, metal baking sheet, or disposable foil. Start with clean hands and work surface area. Knead clay until soft and smooth. For best results, clean your hands in between colors. Shape clay, pressing pieces together firmly. Bake on oven-proof glass or metal surface at 275°F (130 °C) for 15 minutes per ¼" (6 mm) thickness. For best baking results, use an oven thermometer. DO NOT USE MICROWAVE OVEN. DO NOT EXCEED THE ABOVE TEMPERATURE OR RECOMMENDED BAKING TIME. Wash hands after use. Baking should be completed by an adult. Begin by preheating oven to 275 °F (130 °C). Test temperature with oven thermometer for perfectly cured clay. For best results, condition all clay by running it through the Clay Conditioning Machine for several passes on the widest setting. Fold the clay in half after each pass and insert the fold side into the rollers first.

Step 2:
Make sheets of each color using the clay conditioning machine on the number 3 setting. You will need a piece that is about 4.5" X 3" wide for each color. Lay the clay pieces on a piece of scrap paper so they are easy to pick up once they are textured.Step 3:
Spritz the surface of the clay with water so that the texture will release from it easily. Texture the top surface of each sheet of clay by pushing on the texture with your fingers. Turn the texture sheet and texture again until the entire clay sheet is covered with texture. Blot any excess water from the textured clay with a paper towel.Step 4:
Using your finger, lightly swipe just the raised surfaces of the texture with mica powder. Do this for all 3 sheets of clay.Step 6:
Roll up the beads by laying the 1" side along the edge of the needle tool. Curl the 1" edge around the tool and then roll it up. Gently remove the rolled bead from the needle tool. You will need 7 beads for a 7" - 7.5" bracelet. Bake all of your beads according to the directions above.Step 7:
After baking, cut stretchy cord to 10". Attach one end of the stretchy cord to a jump ring with a crimping bead and pliers. String the rolled beads and spacer beads alternately. Attach the other end to the lobster clasp with a crimping bead and pliers. Trim the excess stretchy cord.
Source: www.sculpey.com
RELATED VIDEO
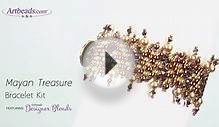
Mayan Treasure Designer Seed Bead Blend Bracelet Kit

How to Make the Agate Coil Bracelet from Simply Beads Kit Club
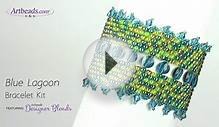
Artbeads Designer Seed Bead Blend Bracelet Kits
Share this Post
latest post
-
 Custom Handmade beaded jewelry May 22, 2026
 -
 Handmade Rosary beads May 2, 2026
 -
 Things to make with beads April 12, 2026
 -
 Easy to make Beaded bracelets March 23, 2026
 -
 Handmade glass beads March 3, 2026
 -
 Making Keychain with beads February 11, 2026
 -
 Make Polymer Clay beads January 22, 2026
 -
 Making copper wire Jewelry January 2, 2026
 -
 Beads for Bracelet making December 13, 2025