
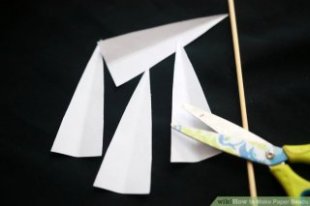
 Cut your paper. Cut long triangles out of magazines, coloured construction paper, wallpaper, etc. The base of the triangle will be the width of the bead and the longer the triangle is, the fatter the bead will become. The slender 1-inch (2.5cm) beads used in this method are made from 1-inch by 4-inch (2.5cm x 10cm) triangles, but 1/2-inch by 8-inch (1.27cm x 20cm) triangles would create fat 1/2-inch (1.27cm) beads. Cut accordingly..
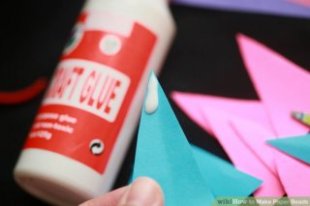
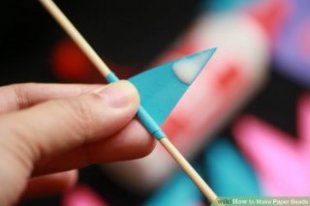
Add your glue. Turn the triangle design-side down and apply a bit of glue to the pointy end. A glue stick or a tiny bit of liquid glue will do. Roll the bead. Starting at the wide end, roll the triangle around itself using a dowel, toothpick, or bamboo skewer. For a symmetrical spiral, keep the triangle centered as you roll; for a more free-form look, allow the triangle to become slightly off-centered.
- Roll tightly, especially if you want the beads to last. Try to avoid having space between the layers.
Finish rolling.Glue the tip of the triangle to the rolled paper. If the bead doesn’t stay tightly rolled up, apply another dab of glue. Hold it for a moment to help the glue to set.
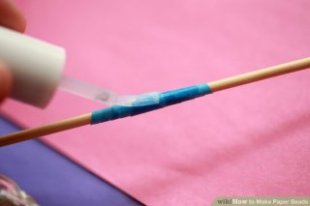
Apply a varnish. Use a finish like Marvin Medium, ModPodge, Diamond Glaze, or a solution of one part clear-drying glue to two parts water. Let it dry thoroughly, making sure it doesn’t stick to anything. You might shove a toothpick into a pincushion or a piece of Styrofoam to allow it to dry completely. Add multiple coats for a glossier, longer-lasting finish.
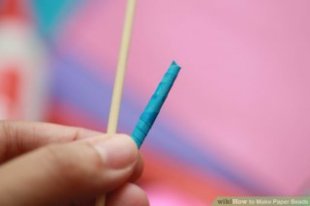
 Remove your bead. Wait several hours until your clear finish has set on the bead. Slide the bead off the end of the dowel. If it is well wrapped and glued, it will hold. If the bead begins to unravel, replace it on your skewer and add more glue and finish where necessary.
Create more beads. Use the aforementioned directions to create as many beads as you would like to finish your project. Make several for jewelry pieces, or create a long string to use for decoration in your home.
 Method 2
Making Beads with Your Own Designs
- Cut your paper. Cut long triangles from a piece of white printing paper. The base of the triangle will be the width of the bead and the longer the triangle is, the fatter the bead will become. 1-inch by 4-inch (2.5cm x 10cm) triangles will make slender 1-inch (2.5cm) beads, whereas 1/2-inch by 8-inch (1.27cm x 20cm) triangles would create fat 1/2-inch (1.27cm) beads. Cut accordingly.
- Create your design. Draw on each cut-out with markers, pencils, or pens. Since the triangle will eventually be rolled onto itself, only the outermost edges and the last inch or two of the tip of the paper will be visible; these are the areas where you should focus your design. Play around with a few colors and design combinations as you go to see what looks best.
- Color the tip of the triangle red and then alternate 1-inch (2.5cm) strips of orange and red marker down the outside edges; this would create a bead with a red center surrounded by orange and red stripes.
- Color the tip of the triangle black, move down an inch, draw 1-inch (2.5cm) black strips on either outside edge, move down an inch, and repeat; this would create a zebra-striped bead with a black center.
- Do not use washable markers, especially if you plan to glaze your beads; the colors will run.
- Add your glue. Turn each triangle design-side down and apply a bit of glue to the pointy end. A glue stick or a tiny bit of liquid glue will do.
 Begin rolling your bead. Starting at the wide end, roll the triangle around itself using a dowel or other slender cylinder. A rounded toothpick or bamboo skewer would work nicely as well. Keep the triangle centered as you roll, otherwise, your designs won’t display correctly.Roll tightly, especially if you want the beads to last. Try to avoid having space between the layers.
- Finish the bead. Glue the tip of the triangle to the rolled paper. If the bead doesn’t stay tightly rolled up, apply another dab of glue.
- Add a varnish. Use a finish like Marvin Medium, ModPodge, or Diamond Glaze. Let it dry thoroughly, making sure it doesn't stick to anything. Try putting your toothpick into a pincushion or a piece of Styrofoam to keep it from coming into contact with anything.
- Remove the bead. When the finish has had time to dry completely, slide the bead off the end of the dowel. If it is well wrapped and glued, it will hold.
- Create more beads. For earrings or a bracelet, you might make only a few beads. For a necklace or other larger project, you'll need more.

RELATED VIDEO


Share this Post
latest post
-
 Make Beaded Friendship Bracelet July 26, 2025
 -
 Handmade wire Jewelry Tutorials July 6, 2025
 -
 Handmade Jewelry San Diego June 16, 2025
 -
 Bijoux et Équilibre : Moins mais Mieux May 27, 2025
 -
 Bead making Kits May 27, 2025
 -
 Handmade Jewelry Charlotte NC May 21, 2025
 -
 What to make with beads and string? May 1, 2025
 -
 Making beads out of paper April 11, 2025
 -
